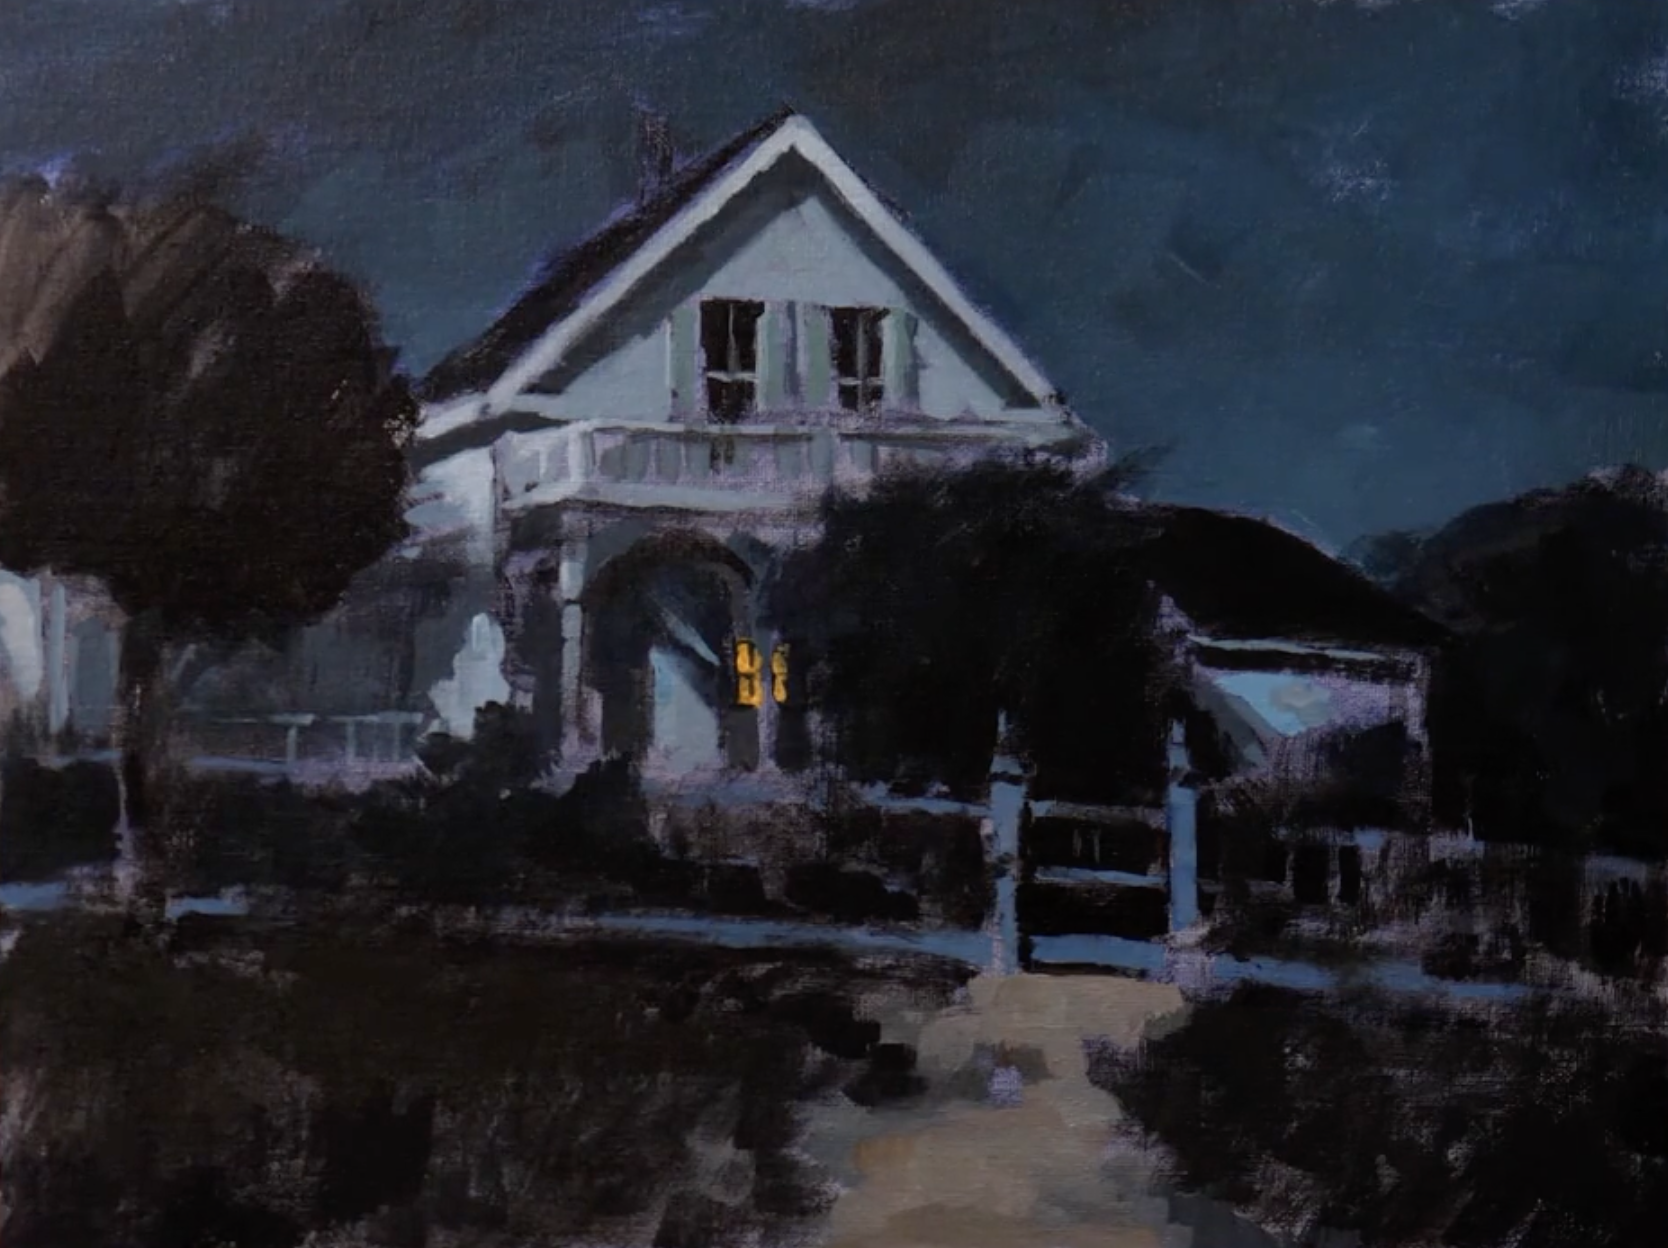
What I Learned From This Nocturne Master Copy
Capturing the Essence of Moonlight in Painting
When painting a nocturne, the challenge is to capture the subtle interplay of light and shadow under the moon's glow. This can be a complex task, but with the right approach, it can lead to stunning results. In this article, I'll share insights from my experience painting a master copy of a nocturne painting. I will be focusing on the importance of values over colors and the techniques used to achieve the desired effect.
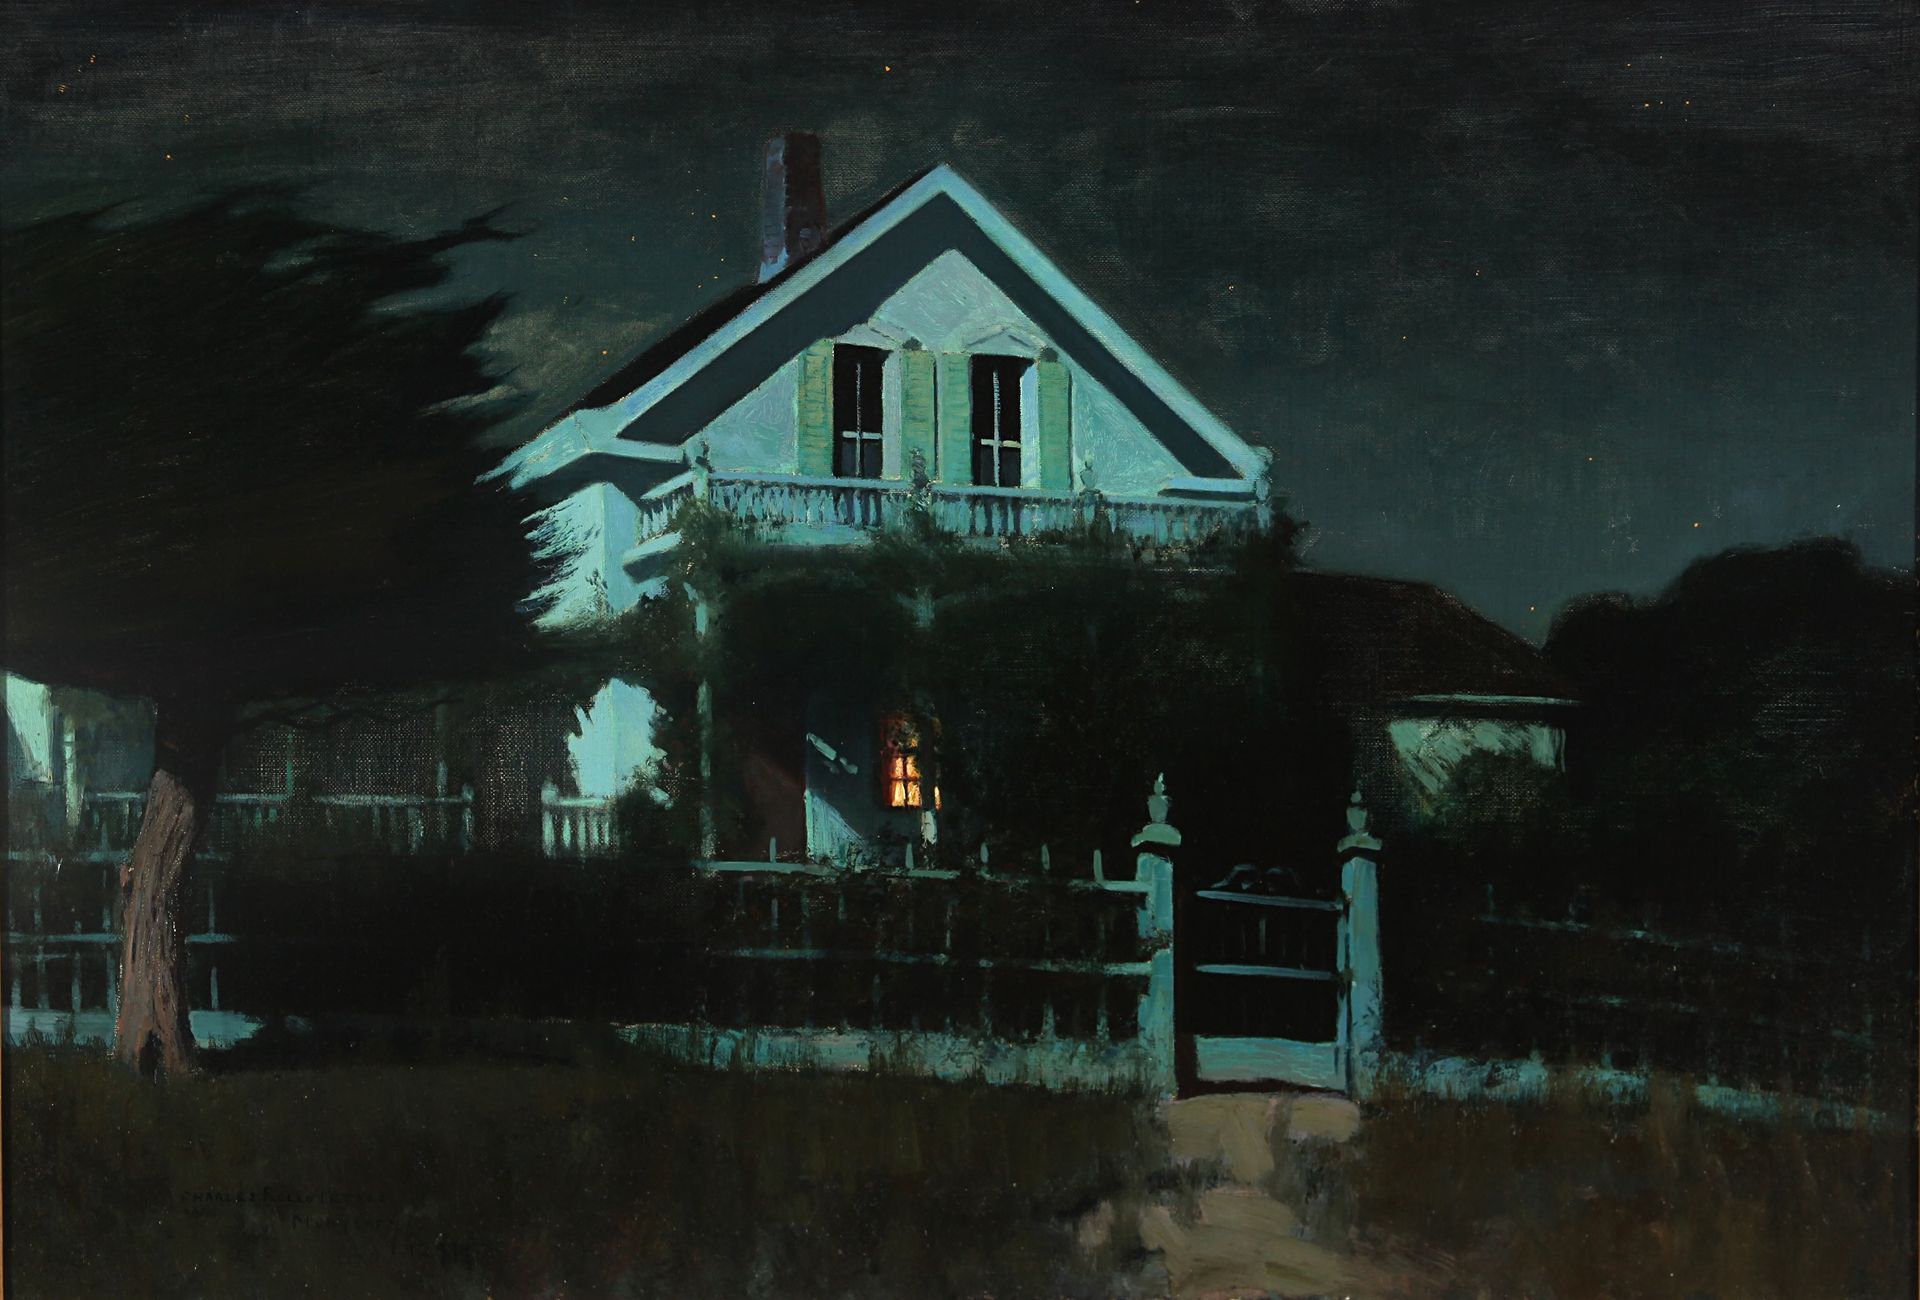
Charles Rollo Peters: Untitled (Peters’ House and Studio, Monterey)
Understanding the Role of Values in Nocturnes
One of the key lessons in nocturne painting is the dominance of value over color. Even though the scene might be colorful, the accuracy of the light and dark values will determine the success of the painting. As I worked through the painting, I found that:
- Gradation: The sky is generally lighter at the bottom and darker towards the top. This gradation helps in creating the illusion of depth and atmosphere.
- Subtle Variations: Slight variations in the moonlit areas are crucial. The areas directly hit by moonlight are going to be lighter, but the value jump in nocturne paintings are not as notable.
Techniques for Capturing Moonlight
Capturing the essence of moonlight in a painting requires specific techniques that help in rendering the unique lighting conditions. Here are some strategies I employed:
- Softening Edges: To mimic the soft, diffused light of the moon, I focused on keeping the edges soft. This technique helps in creating a more realistic portrayal of how light behaves at night.
- Layering for Depth: Adding layers of paint is crucial in nocturne painting. It allows for the gradual build-up of color and value, which is essential for achieving the subtle nuances of nighttime lighting.
Challenges and Adjustments
As the painting progressed, several challenges emerged, particularly in balancing the dark and light areas. Here’s how I addressed them:
- Enhancing the Moonlit Effects: I noticed that the brightest areas needed more emphasis to convey the effect of moonlight striking the surfaces. By adding more white and adjusting the hues, I was able to enhance these areas.
- Deepening the Shadows: To contrast the light areas, I mixed in darker colors, particularly a combination of black and blue, to deepen the shadows. This step was crucial in adding depth and dimension to the scene.
- Continuous Comparison: Throughout the process, I frequently compared my work with the reference photo to ensure accuracy in light distribution and value contrast.
Final Touches and Reflections
In the final stages, I focused on refining details and making subtle adjustments to better capture the nocturnal ambiance:
- Detailing the Window: One specific area that needed attention was a window lit by light inside the house. I carefully adjusted the surrounding colors and added highlights to make it stand out as a focal point of warmth in the cool-toned scene.
- Adjusting Ground Colors: The ground, initially too dark, was lightened to reflect more accurately the subtle light of the moon. This adjustment helped in balancing the overall composition and enhancing the realism of the nocturnal setting.
- Adding Final Accents: Small but significant touches, like a slightly brighter rail or a more defined post, were added towards the end. These elements helped in capturing the intricate details that contribute to the overall mood of the painting.
Conclusion: The Beauty of Simplicity in Nocturne Painting
This painting journey reaffirmed a crucial artistic principle: less is often more. The limited color palette not only challenged my skills but also taught me the power of simplicity. The subtle interplay of light and shadow, the careful modulation of values, and the strategic use of highlights and shadows—all these elements came together to create a serene and captivating nocturne.
I hope this encourages you to explore nocturne painting. Remember, it's not just about replicating what you see but also about interpreting the subtle beauty of the night through your artistic lens. Whether you're a seasoned painter or a beginner, the night offers a unique canvas for your creativity.
Happy painting, and may you find as much joy in capturing the essence of moonlight as I did in this project. I look forward to seeing how you bring your own nocturnal scenes to life!